Nove-Noga Info Post
Nove-Noga Google Cover Image
If you found this page useful,Please Like and Share. Thank you.
Nove-Noga!

 Nove-Noga Google Cover Image for New Changes in Google.
 Have you checked your Google Page recently? One day, I stopped on my Google Page to see what was going on. To my surprise, they had changed the Cover Image specifications and added some heading elements. Needless to say, the old cover page didn't look right any more.
I checked my GIMP files to see what image size I was currently using. My old file was 960x250 pixels. The new image minimum size is 480x270 pixels. If you want to create a balanced image to simply drop into place, you need to maintain that ratio.
Image Sizes:
Recommended Size: 1080x608
Minimum: 480x270
Double Size: 960x540
Double-Double: 1920x1080
Remember, the closer the image is to the minimum, the faster it will load and the easier it is to position your elements as desired.
You can see my Current Cover Pages on the Following Pages.
Nove-Noga G+ http://plus.google.com/+Nove-Noga
Curtiss Martin G+ http://plus.google.com/+CurtissMartin
Be sure to check both pages. I used two different approaches from the same base image and information. I welcome all connections.
My base image that I have been using for Headers and Cover Images is originally, 3072x2304. I have found different portions of the image lend themselves well to my efforts.
The following instructions are for the Cover Images that I created this morning for the Nove-Noga Google page. In my original efforts yesterday, I noticed a color shift in the sunrise portion that I was trying to use. To avoid that problem, I chose to resize the image before I added any of the text to it.
The truth of the final result was that I did not like the placement and text size of my original effort. Following my instructions and notes, I was able to make changes to the Nove-Noga Google Cover Image and repost it in less than ten minutes. I think it was less than five but I want to be accurate.
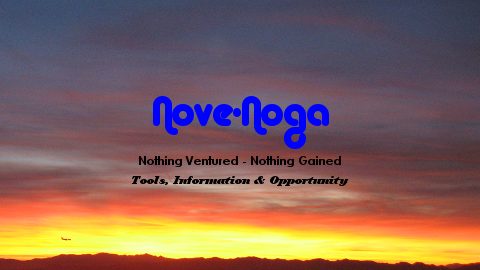
Google Cover Photo for +Nove-Noga.
Notation Methods:
Each instruction line is usually in two parts; Verbal then Symbols.
"#)" The Symbol line will begin with "#)".
EG: #) >>File->Open("Name" = 'work image')[Open/Enter]
">>" Means Select, from the main menu if no {Dockable Dialog} or other source is indicated.
The square brackets mean [click this button].
The parenthesis mean (your entered info) E.G. (picname.xcf)
"Rt>" Means Right Click with your Mouse
"->" Click or Select
"->>" Double Click
">v" Click DropDown button
"^>" Shift + Click
" "literals" " The quotes usually contain what has been referred to as "Literals" meaning that that is exactly/literally what you should see.
" 'Described Item frequently an Icon' " EG: IBO Edit Icon 'Paper&Pencil'
[Action/Enter] is for the Option to Click the button or Hit the Enter key.
"*NB:" is for the Latin "Note Bene" which I interpret as Good Note or Note Well.*
"EG:" is for the Latin "Exempla Gratia" I use it when illustrating an example. See above.
Selection Synonyms: Click, Select, Choose,...
For more info on notation and standard practices see: "GIMP Notation and Descriptions"
*-*-*-*-*-*
1) Fire up your GIMP tool.
#) >>GIMP
2) Open your working image.
#) >>File->Open[(MyPictures)][(myimage)][Open/Enter]
Select Image Area with Rectangle Select Tool.
*NB: As you draw your box, the size of the rectangle in pixels will be displayed at the bottom of your work area. The Ratio is also displayed. I am looking for a box 1920x1080 pixels. The ratio is 1.78:1. Remember, you can discard your current selection with
#) >>Edit->Undo.*
3) Select Rectangle Select Tool.
#) >>{Toolbox}[Rectangle Select Tool]
#) Position pointer on Image, then click and drag box to desired dimensions.
Rectangle 1920 x 1080 (1.78:1) *Note: Recommended Dimensions is 1080x608.
4) Copy selected area to clipboard.
#) >>Edit->Copy
5) Create a new image with Clipboard.
#) >>File->Create->FromClipboard
*-*-* Save your new image. (Please note that it is untitled.xcf and the default directory may not be the place you want this to land.) Give it a useful name but DO NOT change the extension. (It will be easier to make changes with this original file.) Select your target directory. Create a new project folder by clicking [Create Folder] and entering your project name. For some reason, probably my screen size, I cannot see the save and create folders buttons. I manually resize the window so that I can see both. Click [Save] to save your file in your new folder. You will note the new name in the header of your work area. *-*-*
6) Save new image to new work area.
#) >>File->SaveAs(NewSun1.xcf)->>(GIMP folder)[Create Folder](NewSun)[Enter] [Save/Enter]
*-*-* When I first tried this, I was displeased by the color values of the final image at Google. I am going to Scale the image and see if that helps. (It did.) *-*-*
7) Scale image to 480x270 pixels.
#) >>Image->ScaleImage{Scale Image}(Width = 480)[tab][Scale/Enter]
8) Save new image.
#) >>File->SaveAs(NewSun2.xcf)[Save/Enter]
*NB: When saving a sequence of images, NewSun1, NewSun2, ...You can use the right arrow to automatically go to the end of the file name, then backspace over changing character.*
9) Set up Text Tool; Font=Alba Matter Color=0000ff Justify=Centered (Nove-Noga).
In {Toolbox Tool-Options} dialog select [Text Tool] (the "A" Icon).
#) >>{Toolbox Tool-Options}[Text Tool]
In {Tool Options} dialog Click the Font Button and choose Font.
#) >>{Tool Options} [Aa]-> "Alba Matter"
In {Tool Options} dialog Set Color to (0000ff).
#) >>{Tool Options} [Color]{Text Color}(0000ff)[OK/Enter]
In {Tool Options} dialog set Justify to Center.
#) >>{Tool Options} Justify = [Centered]
#) ->@0,5(Nove-Noga)
*NB: Default Size is 18 px. I entered the Text on the image then used the size buttons to increase the size to a pleasing level at 40 px.*
10) Move element to desired position in center of image.
Select Move Tool.
#) >>{Toolbox}[Move Tool]
Shift Click on Element and drag to approximate position in vertical.
#) ^>(Element Nove-Noga)
Select Alignment Tool.
#) >>{Toolbox}[Alignment Tool]
Select Element.
#) Click(Element Nove-Noga)
Center Element.
#) >>{Tool Options}[Align Center of target]
11) Repeat Steps 9 & 10 as necessary for remaining lines of text.
12) Save new image.
#) >>File->SaveAs(NewSun3.xcf)[Save/Enter]
13) Export, default is PNG.
#) >>File->Export[Export/Enter]{Export Image as PNG}[Export/Enter]
14) Upload your new image to your Google page.
#) Go to your Google Page.
#) Click [Change Cover]
#) Select Upload
#) Click [Select photos from your computer]
#) Select the image you created from your working GIMP folder. Click[Open]
If you created your image to the base size of 480x270 pixels, you are done.
Otherwise,
#) Drag the corners of the image box to the outer corners of the image, then Click [Save].
*-*-*-*-*-*
1) During the rewrite of this Info Post to replace the CMS Document that was lost, I created a new Cover Photo for +CurtissMartin. To create the new image, I went to one of my base photos, selected an image area at 1080x608, the current recommended size and copied the pixels to the Clipboard.
Open your working image.
#) >>File->Open[(MyPictures)][(myimage)][Open/Enter]
Select 1080x608 Image Area with Rectangle Select Tool.
#) >>{Toolbox}[Rectangle Select Tool]
#) Position pointer on Image, then click and drag box to desired dimensions.
#) Rectangle 1080 x 608 (1.78:1)
Copy selected area to clipboard.
#) >>Edit->Copy
2) Then created a new image from the Clipboard and saved it as a new File in a new folder.
#) >>File->Create->FromClipboard
#) >>File->SaveAs(Ghead1.xcf)->>(GIMP folder)[Create Folder](Ghead)[Enter] [Save/Enter]
3) For the Text to be added, I created a new base at 480x270 that could be used for any related image. After I created the First Layer of text, I discarded the background so that it wouldn't show when I paste it over my existing Image.
#) >>File->New{Create a New Image} Width=480 Height=270 Units=px [OK]
Select Text Tool; Font=Alba Matter Color=0000ff Justify=Centered (Nove-Noga).
#) >>{Toolbox Tool-Options}[Text Tool] Font=Alba Matter Color=0000ff Justify=Centered (Nove-Noga)
#) Enter "'text'" on Left Side of Image Area.
#) Increase Font Size to Max Width.
With Alignment Tool, move New Text Element to Top of Image Area and Center.
#) >>{Toolbox}[Alignment Tool]; Click(Element Nove-Noga)
#) >>{Tool Options}[Align Center of target]
#) >>{Tool Options}[Align Top Edge of target]
Discard Background.
#) In{Layers-Gradients}Rt-Click "Background"; Select Delete Layer.
4) Then I simply added and positioned the rest of my text and saved the results. This Frame will be available anytime I want it again.
#) >>File->SaveAs(Logo480x270.xcf)
5) Using that same frame, I created a new Logo the same size as my target at 1080x608 and saved it as a new file.
#) >>Image->ScaleImage{Scale Image}Width=1080 [Tab] [Scale]
#) >>File->SaveAs(Logo1080x608.xcf)
6) Copy the content visible to Clipboard, Paste it into your background image, then save and export.
#) >>Edit->CopyVisible
#) >>{Ghead1.xcf}
#) >>Edit->PasteAs->NewLayer
#) >>File->SaveAs(Ghead1080x608.xcf)
#) >>File->Export[Export/Enter]{Export Image as PNG}[Export/Enter]
7) Upload your new image to your Google page.
#) Go to your Google Page.
#) Click [Change Cover]
#) Select Upload
#) Click [Select photos from your computer]
#) Select the image you created from your working GIMP folder. Click[Open]
If you created your image to the base size of 480x270 pixels, you are done.
Otherwise,
#) Drag the corners of the image box to the outer corners of the image, then Click [Save].
To See the Final Results:
Nove-Noga G+ http://plus.google.com/+Nove-Noga
And
Curtiss Martin G+ http://plus.google.com/+CurtissMartin
 For more information on GIMP
and a working list of my GIMP Tutorials,
go to:
http://nove-noga.com/GIMP.html
Time is your most precious commodity.
Do as much with your time as you can.
Nothing Ventured - Nothing Gained.
Nove-Noga!
