


Nove-Noga Info Post
Free Animated Banner for Nove-Noga
Part 1
If you found this page useful,Please Like and Share. Thank you.
Nove-Noga!

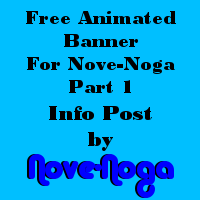 Nove-Noga: Free GIMP Animated Banner Part 1.
My simple *Free banner that I made with the *Free GIMP tool has worked well enough. But I need something that clarifies the purpose of my site.
*Free Means Free!

Continuity is good when creating multiple graphics. As I have learned from Dennis Thorgesen, all of your graphics contribute to your branding efforts. http://www.ibosocial.com/wheelinallover You don't want to be a slave to the past. If it doesn't work then make the necessary changes. But, if it works, and you like it, why change it?

Simple Animated Banner Created with the Free GIMP Tool.

A Simple Text Banner For Nove-Noga.
Old Banner: "Nove-Noga"; Alba Matter 17
Site Header: "Tools, Information and Opportunity"; Bodoni MT Heavy Italic
Banner Top and Bottom Lines: Times New Roman, Bold 13
Banner Center Line: Rockwell Bold 16
Some change is necessary. My original banner had the "Nove-Noga" placed as two words in a vertical arrangement. As Dennis pointed out, everywhere else I am using it as a single word in the horizontal. Apply the changes as you plan your project.
Planning the project.
Placing "Nove-Noga" in the horizontal; Alba Matter 15
Over the tag. "Tools, Information and Opportunity"; Bodoni MT Heavy Italic 10
Top Line: "Nothing Ventured - Nothing Gained. Your Future is Up to You." ; Times New Roman, Bold 13
Bottom Line: "See the Possibilities at www(dot)Nove-Noga(dot)com Click Now!"; Times New Roman, Bold 13
Center Lines: Rockwell Bold 16
MLMs & HYIPs Aren't for Everyone.
You Need a Different Place to Start.
Create Your Own Future.
Learn About Freelancing.
See Real Work Options.
Turn A Hobby into a Career.
Seize Your Future Today!
Foreground Color: 0000ff
Alternate Text Color: 000000
Background Color: 00bfff
Timing: 2.5 seconds = 2500 milliseconds *Note: Changed to 2013 ms in final product.
GIMP stands for GNU Image Manipulation Program. If you don't have your *Free GIMP tool yet, download yours today!
*Free Means Free!
If you are not specifically interested in the *Free GIMP Tool, you may want to jump to the end. If you are interested, I have been trying to develop a notation system that can be used in IBO Toolbox Press Releases. I hate trying to follow someone's instructions where too much has been assumed. As each of these PRs progress, some of these assumptions do crawl in.
*Free Means Free!
Notation Methods:
Each instruction line is usually in two parts; Verbal then Symbols.
"#)" The Symbol line will begin with "#)".
EG: #) >>File->Open("Name" = 'work image')[Open/Enter]
">>" Means Select, from the main menu if no {Dockable Dialog} or other source is indicated.
The square brackets mean [click this button].
The parenthesis mean (your entered info) E.G. (picname.xcf)
"Rt>" Means Right Click with your Mouse
"->" Click or Select
"->>" Double Click
">v" Click DropDown button
"^>" Shift + Click
" "literals" " The quotes usually contain what has been referred to as "Literals" meaning that that is exactly/literally what you should see.
" 'Described Item frequently an Icon' " EG: IBO Edit Icon 'Paper&Pencil'
[Action/Enter] is for the Option to Click the button or Hit the Enter key.
"*NB:" is for the Latin "Note Bene" which I interpret as Good Note or Note Well.*
"EG:" is for the Latin "Exempla Gratia" I use it when illustrating an example. See above.
Selection Synonyms: Click, Select, Choose,...
For more info on notation and standard practices see: "GIMP Notation and Descriptions"
*-*-*-*-*-*
1) Fire up your GIMP tool.
#) >>GIMP
2) Open a new banner for the project from New Template.
#) >>File ->New v>Template ->Web banner common 468x60 [OK]
3) Select Foreground and Background colors: (Default is Black on White.)
In {Toolbox-Tool Options} Choose the Foreground Icon, Set your Color and Click [OK].
#) >>{Toolbox-Tool Options}[Foreground Panel] {Change Foreground Color} (HTML 0000ff) [OK]
*NB: At the bottom of the tool palette are two rectangles positioned one over the other. Naturally the one in front is foreground. Click it and choose the foreground color from the popup tools or enter the HTML notation. [OK]*
Then repeat for the background color:
In {Toolbox- Tool Options} Choose the Background Icon, Set your Color and Click [OK].
#) >>{Toolbox- Tool Options}[Background Panel] {Change Foreground Color} (HTML 00bfff) [OK]
*NB: One of the nice things about GIMP is that it will remember recent colors so that you only need to choose from the tiles displayed.*
4) Fill Background: Choose the "Bucket Fill tool" from the {Toolbox - Tool Options}.
(The paint can to the right of the text "A") In the tool options menu under "Fill Type" choose "BG color fill". Then click your new banner space to fill it with the background color.
#) >>{Toolbox-Tool Options}[Bucket Fill]
#) >>{Tool Options} [Radio Button - BG Color Fill] [Your New Banner Space]
*NB: You could wait until later to do this but I like to make sure the colors are doing what I want.*
**NB: Somehow my {Tool Options} have become separated from the {Toolbox} if you do not see {Tool Options} when you need it, >>Windows ->Dockable Dialogs ->Tool Options, to make it reappear.**
*-*-* My banner will have two constant areas and one area of change. I will set up the Logo and Tag on the left side of the image first. *-*-*
*-*-* Begin Text additions to banner: Select the "Text Tool", the "A" to the left of the "Bucket Fill tool" from the {Toolbox- Tool Options}. Then in the {Tool Options} below, click the font button [Aa] located just below the word "Text". Choose your font from the drop down list. I am going with "Alba Matter". Next I set the Size to 15.
Because I am going to be joining two types of text into a single structure, I want to take a little care as a I set them into place. Position your cursor over your work area. At the bottom left edge of the working window you will see a display indicating the cursor position in pixels "px" and the current zoom at 100%. Position the cursor at 0,5 and click to set the starting point of your text. Then Enter your text (Nove-Noga). If you want to change the Font or text size use the {Tool Options} Dock.
The following is the Notation for the above process.*-*-*
5) Set up Text Tool; Font=Alba Matter Size 15px Justify=Centered (Nove-Noga)@0,5
In {Toolbox Tool-Options} dialog select [Text Tool] (the "A" Icon).
#) >>{Toolbox Tool-Options}[Text Tool]
In {Tool Options} dialog Click the Font Button and choose Font.
#) >>{Tool Options} [Aa]-> "Alba Matter"
In {Tool Options} dialog Set Size to 15 px
#) >>{Tool Options} Size = 15 px
In {Tool Options} dialog set Justify to Center
#) >>{Tool Options} Justify = [Centered]
->@0,5(Nove-Noga)
*-*-* In order to change to another line of text, you can click outside of the current text areas or change tools and come back in. I dodged to the background layer to clear the connection before making changes to the text tool. *-*-*
6) In {Layers-Gradients} Select Background layer
#) >>{Layers-Gradients}(Background)
7) Create second line, (Tools, Information and Opportunity); Bodoni MT Heavy Italic 10 color=black; in two lines @0,35
In {Toolbox Tool-Options} dialog select [Text Tool] (the "A" Icon).
#) >>{Toolbox Tool-Options}[Text Tool]
In {Tool Options} dialog Click the Font Button and choose Font.
#) >>{Tool Options} [Aa]-> "Bodoni MT Heavy Italic"
In {Tool Options} dialog Set Size to 10 px
#) >>{Tool Options} Size = 10 px
In {Tool Options} dialog set Color to HTML 000000
#) >>{Tool Options} [Color] {Text Color} (HTML 000000) [OK]
Click working image @ 0,35 and key in text. To start second line hit [Enter key]
#) ->@0,35(Tools, Information [Enter] and Opportunity)
8) Select alignment tool (Box with 4 arrows) from Toolbox; Drag a selection box over the widest of your two elements and click the Tool Options Tile to Align to Bottom of Target
#) >>{Toolbox}[Alignment Tool];Drag a selection box over target;
#) >>{Tool Options}[Align bottom of target]
*-*-* I want to Position the upper element (Nove-Noga) centered over the lower element. There may be a better way to do this. For now, I am going to take note of the width of both elements. Then I will position the center of the upper element over the center of the lower element by observing the cursor positions as I did above. *-*-*
*NB: See Step 12 in the Next PR for the solution.*
9) Note:Top Element Width=64, Center=32. Bottom Element Width=84, Center=42
Select Move tool from Toolbox (Crossed Arrows)
#) >>{Toolbox}[Move Tool]
Select top layer (Nove-Noga)
#) >>{Layers-Gradients}(Nove-Noga)
Position Cursor over center line of selected element @32,10 and shift+click to drag the element to 42,x where x allows a pleasing vertical arrangement.
#) ^>@32,10 Drag to 42, x *NB: x = 22 px.
*-*-* While my descriptions are sequential to allow you to repeat my efforts or easily apply them to your own, the truth is that I tend to back and fill as I work out these instructions. I generally try to save at break point as I go along. The next step will merge the existing elements so, I will be saving now. *-*-*
10. Save your masterpiece: Select File->Save As(Please note that it is untitled.xcf and the current directory may not be the place you want this to land.) Give it a useful name but DO NOT change the extension yet. (It will be easier to make changes with this original file.) Select your target directory. Create a new project folder by clicking [Create Folder] and entering your project name. For some reason, probably my screen size, I cannot see the save and create folders buttons. I manually resize the window so that I can see both. Click [Save] to save your file in your new folder. You will note the new name in the header of your work area.
#) >>File ->SaveAs (AniBan1.xcf)->>(GIMP folder) [Create Folder] (AniBanner) [Enter] [Save/Enter]
At this point, we have created the first file of the banner. GoTo Part 2 if you are interested in following the rest of the project. Part 2 will cover the rest of the base structure, setting up each animation panel and the creation of the working gif.
Simple Animated Banner Created with the Free GIMP Tool.
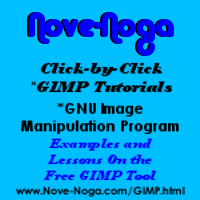 For more information on GIMP
and a working list of my GIMP Tutorials,
go to:
http://nove-noga.com/GIMP.html
Time is your most precious commodity.
Do as much with your time as you can.
Nothing Ventured - Nothing Gained.
Nove-Noga!
